Hello and welcome back. Here we are again with yet another review. Today I will be doing my best to cover the vaporesso Xros 4 Pod Kit that was sent to me by Sourcemore in order to provide you with a fair and honest review. I have mentioned in other reviews but in case you haven’t read them, I’m a fan of the Xros line of products and have been using them since the very first Xros was released. Back then I was reviewing for Vaporesso but lost touch with them over time. Fortunately, Sourcemore carries a wide variety of Vaporesso products so I can still review some of them.
The Xros 4 has a 1000mah internal battery like its predecessors but has a 5V/2A charging rate to get you back to full charge in 30 minutes. The updated pods that come with the kit have a 3ml liquid capacity and make use of mesh coils in the pods. The Xros 4 doesn’t have a display screen but it does offer three output levels and has adjustable airflow control.
WHAT’S IN THE BOX?
1* XROS 4 Battery
1* XROS Series 0.4Ω Mesh Pod 3ml (Pre-installed)
1* XROS Series 0.8Ω Mesh Pod 3ml (In box)
1* Type-C Charging Cable
1* Reminder Card
1* User Manual & Warranty Card
SPECIFICATIONS:
Brand Vaporesso
Product Name XROS 4 Kit
Dimensions 120.80*24*14mm
Pod Capacity 3ml
Resistance 0.4Ω/0.8Ω
Filling Top filling
Battery Capacity 1000mAh
Charging Type-C, 2A
Compatible Pod The entire XROS Pod series
Charging Type-C, 2A fast charging
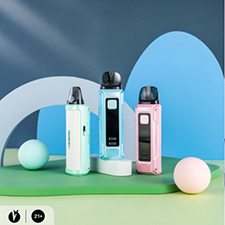
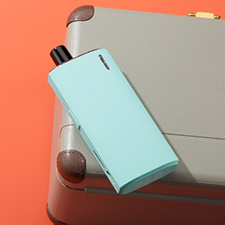
Color Black, Silver, Blue, Green, Lilac Purple, Sunset Neon, Pink Mint, Champagne Gold, Pastel Palette, Bloody Mary
INITIAL THOUGHTS:
The packaging for the Xros 4 is similar to what I’ve seen from them in the past. The front of the box has a black background with the Vaporesso logo featured in green. The Vaporesso and Xros 4 names appear in white on the top and bottom of the face. In the center is a very nice color picture of the device contained inside as well as a banner letting you know that the 3ml top fill pods are included and one of them is rated at .4 ohms. The back side of the box is black with white writing listing some specifications and a contents list as well as company information.
Once the outer shell is removed, you are greeted by a black envelope that contains the user manual and an information card. Underneath that is the Xros 4 with the .4 ohm 3ml pod pre-installed, USB-C charging cable, and spare .8 ohm 3ml pod.
The Xros 4 can be button fired or used as an auto draw device. It has a 1000mah battery that can be charged in approximately 30 minutes thanks to the 5V/2A charging rate. The sides of the Xros 4 are indented to add to the hand feel. One of the thinner sides has a single airflow hole while the other side has the charging port.
As you can see in the third picture below, there is a sticker on the front of the Xros 4 when it is first received to let the user know how to operate the device. Press the button 3X to choose between the three available power levels. Press the button 4X to lock the device so it can only be activated by auto draw. Press the fire button 5X to turn the device on/off. When adjusting the output level, there is a different colored ring above the fire button depending on the level and there will be one, two, or three symbols illuminated under the light ring so you don’t need to memorize what the color means. The light ring also has a second function which tells the user the battery level. The battery level indications are as follows.
Green = 70-100%
Blue = 30-70%
Red = 0-30%
As far as branding goes, the Vaporesso logo is present on the bottom of the back side where the sliding airflow control is located. Underneath the instructional sticker on the front, the Vaporesso name is etched on the body near the bottom vertically.
The pod opening on the mod is pretty much what we’ve become accustomed to seeing. There are two magnets that hold the pods in securely, two spring loaded contacts, auto draw sensor, and a large opening that leads down to the sliding airflow control.The Xros 4 is compatible with not only the included .4 and .8 ohm 3ml pods but is also compatible with all of the different Xros pods available. The Xros pods are a true top fill pod where the mouthpiece is removed exposing a fill port with a gasket as well as a venting port on the opposite end so air can escape while filling. The resistance for each pod is clearly labeled on the bottom of the pod. I might have mentioned this before but out of all of the pods that I’ve reviewed, the Xros is my favorite for two reasons. First is the top fill feature so I don’t have to remove the pod to fill or mess with a rubber plug. Secondly is that I never have any leaking thanks to the SSS anti-leaking technology that Vaporesso uses. The Xros pods use the COREX 2.0 technology to provide increased taste and vapor production while increasing the coil lifespan.


FINAL THOUGHTS:
It has been a pleasure testing the Vaporesso Xros 4. I was not surprised as a user of the Xros 1, 2, 3, and Pro versions. To me, the Xros 4 in the next logical transition in the Xros line. While keeping the same basic shape and feel it now offers three different power levels without making the device more complicated by adding a display screen and menu. The addition of the instructional sticker on the device makes it easy enough for just about anyone to use.
I love that Vaporesso has kept the pods clear while increasing the liquid capacity to 3ml. The very first 3ml pods I bought after receiving the Pro were not top fill. They had a rubber plug on the side so the pod had to be removed to fill. The ones included in the kit are both top fill and 3ml which is a great combination.
I used a mango cookie liquid in the .4 ohm pod that I have been using for a while and am familiar with. The taste was very good and I was able to get a tight RDL with the airflow open. I ended up using the .4 ohm pod on the lowest setting. For my tastes, the middle and highest power levels made the vapor too hot for me after just a couple of puffs. Next up I used a guava green tea liquid in the .8 ohm pod. I normally run .8 ohm pods in my other Xros devices so didn’t notice a huge difference. On this one I was able to run the highest power level comfortably with the airflow closed a little to provide a loose MTL. A tight MTL can be achieved but that is not my preference.