This time it’s a POD type VAPE!
[GeekVape] Review of Digi Q Kit!
While it has a unique appearance, you can also control airflow and adjust the output! Furthermore, it is a POD type device that reads the resistance value of the attached pot and automatically sets the output width!

Features
Built-in 1000mAh battery
Automatic drawing and button triggers
HD LETD display with RGB lights
Precise air volume/temperature adjustment
2ml capacity, easy to fill from above.
Compatible with Q cartridges
VAPE is considered a luxury item, but recently it has also become part of fashion.
The Digi Q that we will be reviewing this time may seem like a fashionable device due to its unique appearance, but it is also a device with excellent performance.
Let's take a look!

Package contents
GeekVape Digi Q Device
GeekVape Q cartridge (2ml, pre-installed: 0.6Ω, spare: 1.2Ω)
strap
user manual
Two pots are included, although the resistance values are different. You can enjoy it for a long time with just this starter kit.
However, a charging cable is not included...
Furthermore, the user manual was not written in Japanese.
However, it does come with a strap, so it may be a good thing for those who like how to use it.

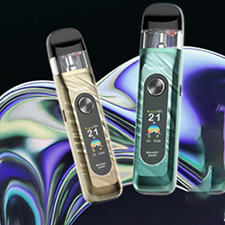
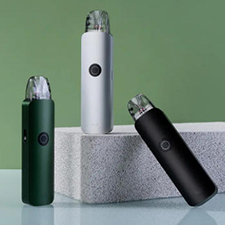
There are 7 main body colors!
All the colors have very aggressive designs, including some that are 〇undam-ish and others that are 〇-subverter-ish.
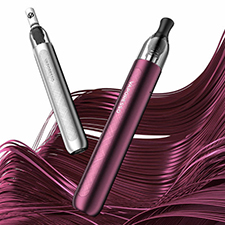
The product in this review is Future Purple.

So, the unique look that I have written about many times is like this!
I thought the focus was on appearance, but the quality is good and the entire body is made of metal, so it doesn't look cheap.

However, the back side looks like this...
Although it is not a double-sided design, the back side is of course made of metal.

There is a typeC charging port and operation button on the side of the main unit, as well as a strap hole.

Airflow control on the opposite side!
You can adjust the draw feeling (air resistance when smoking) according to the resistance value of the pot and your preference.

When you remove the pot from the main body, it looks like this!

I mentioned above that there is a button on the side part, but it supports auto draw.

This is what the pot looks like!
The maximum capacity is 2ml, which is a common specification.

The resistance value and recommended wattage of the pot are listed on the back.
As I wrote above, the main unit reads the resistance value depending on the pot installed and automatically sets the output width.

To fill the pod, remove the mouthpiece part of the pot.
It feels a bit stiff to put on and take off, but it doesn't seem like there will be any accidents where it comes off when carrying it around.

This is what the filling opening of the pot looks like!
Although it is quite narrow, the tip of the unicorn bottle sticks in just the right way.

Click the button 5 times in a row to turn the power on and off!
When you turn on the power, the set wattage and remaining battery power will be displayed on the screen.

With the power on, click the button three times in a row to adjust the output.
When you enter the adjustment mode, the W number part will flash and you can adjust in 0.5W increments.
Up to 25W possible, up to 25W possible! (Depends on the installed pot)
[GeekVape] Let's try using Digi Q Kit!

This is how the capacity is filled!

After filling the pod, leave it for about 5 minutes!
When using a new pot, wait until the fluid soaks into the coil inside the pot.

Let's try smoking it!
Hmm...
i feel good!
Like the POD type, it has the power to express the taste down to the smallest details.
The draw feeling was a bit heavy DL when the airflow control was fully open, and just the right MTL when fully closed.

This is what it looks like when you attach the strap!

This strap is actually removable!
So that’s it!
A POD type device that not only looks impressive but also has high functionality!
Simple designs are good, but personally, I quite like these kinds of designs.